 |
 |
 |
 |
 |
 |
 |
 |
 |
 |
 |
 |

All Categories • Continuing Committee • Organized Play • Rules Committee • Deck Designs • Virtual Expansions
Card Extras • Special Events • Tournament Reports • Everything Else • Spotlight Series • Contests
Strategy Articles
Into the Final Frontier, Part 8 - Dealing With Dilemmas (1 of 1)
by Nathan Miracle; Updated by James Hoskin, Staff Writer
11th March 2009
"If you can't take a little bloody nose, maybe you had better go back home and crawl under your bed. It's not safe out here. It's wondrous - with treasures to satiate desires both subtle and gross - but it is not for the timid." - Q, from the Next-Gen Episode "Q, Who?"
It is one of the things that makes Star Trek distinctively Star Trek. Every week, the crew faces new challenges, new difficulties... one might even say new dilemmas. In the Star Trek Customizable Card Game, you take control of the dangers of the galaxy for your opponent. The universe is vast, and so are the number of dilemmas to choose from, so before we talk about the list below, let's quickly review how dilemmas work.
When Jane attempts a mission, she declares how many personnel will be in the attempt. Bill then counts how many overcome dilemmas are beneath the mission. He subtracts that amount from the number of personnel in the attempt to determine how many dilemmas he may draw from his dilemma pile and how many counters he may spend on dilemmas for this mission attempt. Remember, when Jane attempts a planet mission, Bill may only play dual and/or planet dilemmas. Likewise, when Jane attempts a space mission, Bill may only play dual and/or space dilemmas.
Bill decides which dilemmas he wishes to play and places them face-down to create a dilemma stack for Jane to face. He places the remaining dilemmas face-up beneath his dilemma pile. Whenever Bill reaches a face-up card in his dilemma pile, he will shuffle the pile and place it face-down.
Alright... so now we're up to speed on dilemma usage. Since you've already built your draw deck, let's build a dilemma pile to go with it. Dilemma piles come in many different varieties. The dilemma pile in this particular article focuses on stopping personnel. This type of dilemma pile has several advantages. The primary advantage is reliability. Few of the dilemmas in this dilemma pile offer a way for your opponent to avoid their effects. Another advantage of this type of dilemma pile is its adaptability. Some dilemma piles require help from your deck, but this one may be attached to a variety of decks without hurting its performance. Lastly, and perhaps most importantly, this dilemma pile includes easy-to-obtain cards. The pile below requires no rare or premium cards, so you should have little trouble acquiring them. You will find a couple of dilemmas in this dilemma pile, such as Pinned Down (pictured left), that begin with the phrase "randomly select a personnel to be stopped." Others, such as Triage and Cultural Differences, require your opponent to choose a personnel to be stopped (or, if he or she cannot, randomly select a personnel to be killed). Using these two types of dilemmas, you can choose how many of your opponent's personnel to remove from the mission attempt. With practice, you can prevent your opponent from completing any mission while at the same time allowing him or her to overcome only a minimum number of dilemmas.
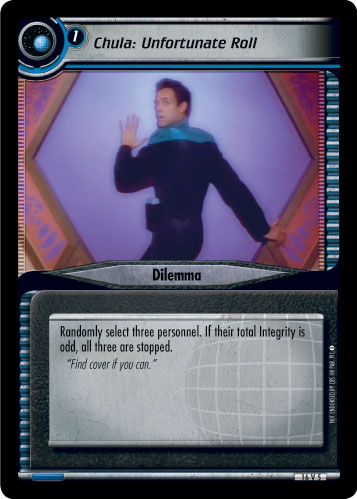 Of course, there are other types of dilemmas in this pile as well. Chula: Echoes and Chula: Unfortunate Roll (pictured right) both have the ability to stop three personnel, but at the risk of not stopping any. Likewise, Racial Tension could stop two personnel, or it could stop none. Make sure to watch as your opponent plays personnel so you can see how risky using these cards would be. Alternately, if you don't like paying that much attention, you could use Secret Identity to take a peek at your opponent's personnel and plan for the future.
 Crew Advancement and Outmatched (pictured left) both feature the keyword: Consume. If a dilemma your opponent is facing has this keyword on it, he or she will tell you to consume a number of dilemmas; you simply take the number of specified dilemmas from the top of your dilemma pile and place them beneath the mission being attempted. Crew Advancement consumes two dilemmas, a fixed number, so you therefore take the top two cards from your dilemma pile and place them beneath the mission. Outmatched, on the other hand, does not specify a specific number of dilemmas. You may choose any number of dilemmas to consume with this card. You won't be able to use these dilemmas later, though, so Outmatched is best used as a last-ditch effort to stop your opponent.
 Another keyword that appears on dilemmas, such as Breaking the Ice (pictured right) and We'll Never Know, is Persistent. When your opponent's personnel complete a mission, you may discard a non-personnel card from hand to take a dilemma with this keyword from beneath that mission and place it back under your dilemma pile. In effect, you are paying for the opportunity to use it for a second time - something that is useful if you have a small dilemma pile.
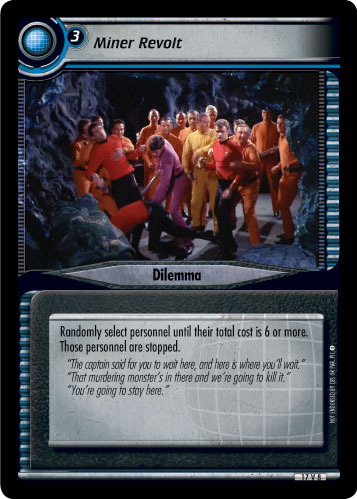 This dilemma pile has the absolute minimum of 20 dilemma cards in it. When you start building your own dilemma piles, you may include as many as you wish, so long as there are at least 20 dilemmas and no more than three copies of any single dilemma. Having a larger dilemma pile will give you more options against your opponent, but it will also result in your dilemma pile being less consistent.
One final thing to watch out for is the ratio of dilemmas in your pile. You don't want to draw a handful of planet dilemmas when your opponent's personnel are attempting a space mission, and vice versa. Also, you don't want to have to play several low-cost dilemmas to stop your opponent's personnel when one-high cost dilemma will do the same job for you (because each overcome dilemma will subtract from the number of dilemmas you can draw and play on the following attempt.) Conversely, if your opponent only gives you a low number of dilemmas to draw from your dilemma pile, you don't want to just draw dilemmas that are too expensive to play. As a guideline, a good place to start would be a ratio of approximately 50% dual, 25% planet and 25% space dilemmas in your dilemma pile, with a fairly even mixture of low-cost and high-cost dilemmas. You can then try it out in a game or two and customize it to your preferences.
Now you've completed your deck entirely! Tune in next time, when James Hoskin tells you how to get plugged-in to your local gaming community in the final part of this series.
Have an opinion about this article? Post it here!
-djl-
This deck is currently eligible for the following family or families of achievements:
- Starfleet Player
- The Bare Minimum
- Highlander II
- Common Problems
- Unbroken I
- Good Casting: Armstrong (Maxwell Forrest)
- Good Casting: Spiner (Lore)
Decklist
Back to Archive index